Ever thought about installing a stove or log burner in a gazebo? This blog post will guide you through the process and highlight important factors to consider when selecting the right stove and flue system.
What About a Pergola or Covered Patio - Are They The Same?
Think of a gazebo as the charming spot in the garden you'd love to sip lemonade in. These are freestanding structures, usually shaped like a hexagon or an octagon, with an opaque roof. Gazebos give you the luxury of full shade, and their roofs can range from domed to pyramid-like. The perfect spot for a chill afternoon, right?
Then we have the graceful pergola. It's like the vine's best friend, offering an inviting framework for plants to climb. Pergolas have a latticed roof that lets some sunshine peek through, providing you with just the right shade. Ideal for semi-shaded walkways, cosy sitting areas, or as a green passageway.
Last but definitely not least is the covered patio - your home's trusty extension. These can be attached to your home or stand-alone, shielding your patio with a solid roof. It's like having your living room outdoors, protecting your comfy patio furniture from the elements, and making the perfect space for an outdoor party or a calm evening.
So, that's it! Gazebos, pergolas, and covered patios are all great, just slightly different. Even though their names often get mixed up, each has a unique charm and function. When installing an outdoor fireplace, the instructions will be similar, if not exactly the same, for a Gazebo, Pergola and covered patio.
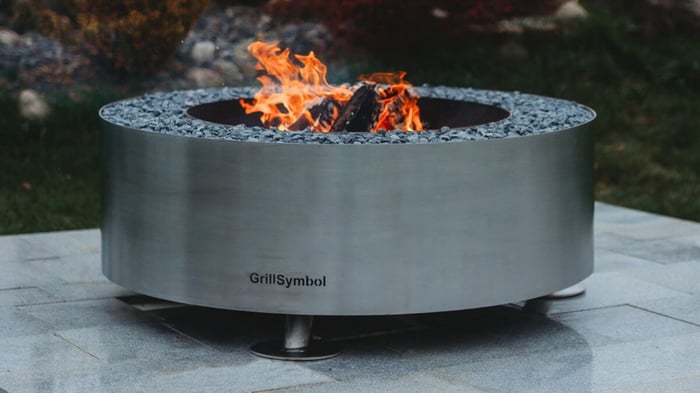
We have different advice when considering using a fire pit in a gazebo.
Selecting the Perfect Stove for Your Gazebo
The most crucial aspect of choosing the right stove is its heat output. Traditional calculations won't apply for outdoor installations due to airflow that might dissipate the heat. We'd recommend selecting a stove with a heat output of at least 20KW.
Indoor log burners aren't suitable for outdoor usage due to several reasons:
-
Cast Iron Stoves can crack because of sudden temperature changes.
-
For efficient performance, indoor stoves need heavy baffling with at least a 4m flue.
-
Indoor stoves lack a protective coating to withstand harsh weather conditions.
-
Outdoor stoves heat up quickly and often have cooking features and attachments.
-
Hence, a steel stove designed for outdoor use with 20kw+ power is ideal.
The right stove can turn your gazebo into a comfortable retreat all year round, providing a cosy spot to relax after a long day.
Safety Considerations
Before starting, please remember that safety is also an extremely important consideration.
-
Proper Clearance: Always maintain the clearance recommended by the stove manufacturer between the stove and any combustible materials to reduce the risk of accidental fires. Each stove model can have different clearance requirements, so always refer to your specific model's manual.
-
Carbon Monoxide Alarm: Install a carbon monoxide alarm in your gazebo. This is essential as burning wood produces carbon monoxide, and an alarm can help alert you to any dangerous build-up.
-
Professional Installation: If you're not confident in safely installing the stove yourself, consider hiring a HETAS-registered installer. This ensures the installation meets all safety regulations and requirements.
Setting Up a Flue System in a Gazebo
Flue system installation in a gazebo usually takes 30 minutes to 2 hours. Key factors to consider are:
-
Can the flue be installed directly upwards through the roof?
-
Do you feel confident in fitting a waterproof flashing?
-
Can the stove be placed in a way so that the flue can wind around the gazebo roof in a 'swan neck' manner?
Now let's walk through each installation method, starting with the 'straight up' method.

Installation Method 1: Straight Up
Step 1: Positioning the Stove
Choose a spot for the stove, ensuring that there's enough space around it, away from any materials that could catch fire.
Ensure the flue can go directly up and through the roof, unobstructed by roof joists. Once the stove is in position, use a plumb line to mark where the centre of the stove aligns with the roof.
Step 2: Cutting the Roof
Mark a square roughly 275mm x 275mm and cut through the roofing material using a jigsaw. Don't worry if it's not neat - this area will be covered later.
Ensure timber structures are at least 60mm from the twin-wall flue system.
Step 3: Assembling the Flue System
Insert a metre of single wall flue into the collar of your stove, and secure it upright with the locking bolts.
Next, insert the adapter into the top of the single wall flue. Lower the twin wall flue section from the roof into the adapter, securing it with the locking band. No fire cement is needed. Once the flue is vertical, install the internal trim plate. This will help hold the flue vertically for the next step.
Step 4: Installing the Flashing
Cut the rubber part of the flashing using scissors to fit tightly over the flue pipe. Slide it down until it rests against the roofing material.
Secure the flashing to the roof along its outer edges, then seal the outer edge with clear silicone. Optionally, you can use Flashband to seal around the outer edges and apply heat to bond it to the gazebo roof.
Lastly, install a storm collar over the rubber flashing to protect it from UV damage, and position the cowl with the locking band.
Your stove is now installed using the 'straight up' method. You can now follow the first lighting instructions to initialise your new stove.

Installation Method 2: Swan Neck
The 'swan neck' method is the simplest and does not disturb the roof structure.
-
Position the stove, remembering to keep it clear of combustible materials.
-
Insert a 45-degree elbow into the stove collar.
-
Place a 1m stove pipe into the 45-degree bend. Adjust the stove position if necessary.
-
Insert a second 45-degree elbow. The flue should now point upwards.
-
With a second person's help, insert the final upright flue section and support it by hand. It's often easier to add the cowl at this point to avoid using ladders.
-
Install the support bracket to the nearest structural beam. This will keep the flue in position in windy conditions.
Congratulations, your stove is now installed using the 'swan neck' method! Follow the first lighting instructions to initialise your new stove.
Frequently Asked Questions
Can I Use An Indoor Cast-Iron Stove In My Gazebo?
No, indoor stoves are not designed for outdoor use. They can crack due to temperature changes and lack the necessary coating to withstand the elements.
What Size Flue Do I Need For My Outdoor Stove?
The size of the flue is determined by the stove model. Follow the stove manufacturer's guidelines to select the correct size.
Should I Install The Log Burner Myself Or Hire A Professional?
While the process can be done DIY, hiring a HETAS-registered installer ensures safety and compliance with regulations.
However, follow the manufacturer's guidelines and local regulations if you install it yourself.
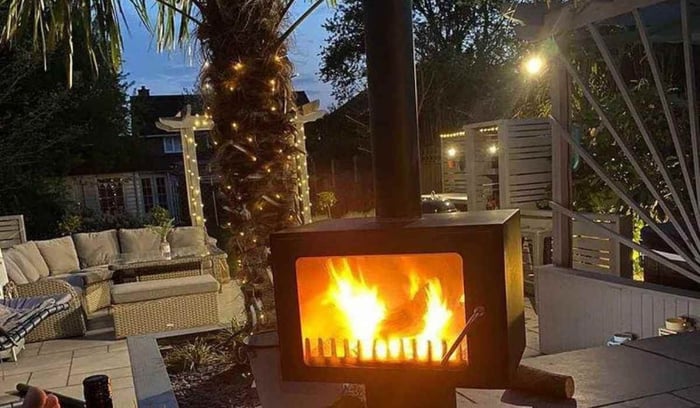
Final Words
Adding a log burner in a gazebo provides more efficient heating than gas or infrared heaters. It also creates a unique ambience and a focal point in your garden.
The stove featured above is our Fiesta Garden Stove.
Please contact us directly at 0800 949 4040 for further assistance or information.
Subscribe to our email
Just enter your email address below to receive a monthly email with links to all the latest blog posts. Simple unsubscribe at any time.